Showing posts with label Childrens Crafts. Show all posts

Thursday, June 25, 2009

Annys Kreative Kidstuff Ideas--Toddler Hooded Towel Tutorial


Anny's Kreative Kidstuff--Hooded Bath Towel


I made this Hooded Towel for my Granddaughter Kasja while I was in Texas and thought I would share how you can make your own.

I had found two Ribbon Embellished bath towels on clearance at Shopko for $2.98 each. (Regular $24.99 each). Cost of my project: $5.96.

This is an easy beginner project.

1. Purchase 2 full size bath towels or l bath towel and one hand towel. The second towel will be used to make the hood.


2. Cut a 14 inch piece across the end of the full size bath towel or lengthwise on the edge of the hand towel cut the hood piece. By doing this, the hemmed edge of the towel becomes the front hem on the hood.

3. Fold the l4 inch rectangular strip in half, rightside together.


4. Stitch down the unfinished edge from fold to bottom edge using a 1/2 inch seam allowance. Stitch again next to the line of stitching using a zig-zag or use an overcast stitch in the seam allowance to prevent raveling.


5. Flip the hood piece rightside out.

6. Cut off the bottom 1 inch on the bottom edge of the hood. Otherwise the hood will become too bulky in the seam allowance.


7. Use a tape measure and measure the child's head add 1inch. Use a compass or find a circular object to make a pattern the correct size. I used a cereal bowl and traced it onto paper to make the pattern.

8. Find the center of the bath towel by folding it in half lengthwise and pin the shoulders and then in half cross wise to find the center front and back and pin.

9. Fold the pattern in half and then in half again, mark the shoulder marks and front and back.
Match up the pins and cut out the neck hole.

10. Fold the towel to find the center front and center back in the neck opening.

11. Then match front and back pins to find find the quarter of the neck opening. Place pins on each right and left sides.


12. Place hood piece in neck opening, match back seam to back pin, and place each side of front hood to the left and right of the center front pin.


13. Stitch hood to neck opening using 1/2 inch seam allowances. You may have to ease the hood into the opening to get it to fit. My opening was a little larger than the hood piece so I placed the towel side down toward the feed on the machine which helped it ease in.

14. After stitching the seam, set the machine to a zig zag stitch or an overcast stitch and stitch in the seam allowance to prevent raveling.

15. Clip Threads and you have a inexpensive hooded towel ready for swimming or bathtime.


Finished project.

The project can be modified to a larger size by using beach towels and a larger hood piece.


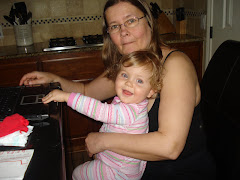
Nana and Kasja


I bought the towels to make the hooded towel long before Kristy and Chris bought their new house with the pool and had no idea that Kristy had painted the girls bathroom a pale yellow with a floral theme. A perfect match.

Wednesday, June 10, 2009

Annys Kreative Kidstuff Ideas--Free Color Flash Cards


Make your own Children's color flash cards out of
Paint Chips.


Pick up a variety of color paint chips at your local Hardware store to make some inexpensive flash cards. I found these cute Disney Paint Samples at Home Depot.

Punch a hole in each using the first as the pattern to make sure they are punched in the same spot on each.

A a key chain and I added a sticker to the key chain boggle.

On the other side use a Sharpie Marker to name the color to help the kids learn to read their colors along with naming them.

These are small enough to pack for traveling on your summer road trips.

This is an easy and fun Craft project to do with the kids and all for FREE.

Monday, June 1, 2009

Anny's Creative Kidstuff Tutorial: Toddler Crayon Roll-ups


When we were in Texas, I designed this Toddler Crayon Holder for Kasja.

Supplies List
Buy 2 different fabrics of 1/4 yard each or 2 different Fat Quarters
1/4 yard fusible fleece
14 inches of 1/2 inch decorative ribbon for tie
1/3 yard of any decorative ribbon for pocket decoration
Coordinating thread


1. Cut 2--7 inch by 13 inch Rectangles (Outside Tote Cover) Piece 1 (Black)
2. Cut 1--9 inch by 13 inch Rectangle (Inside Pocket) Piece 2 (Red)
3. Fold Piece 2 in half the long way and iron
4. Cut 1--7 inch by 13 inch rectangle out of fusible fleece
5. Iron on the wrong side of one of the Piece 1 rectangles
6. Stitch a colorful ribbon along the folded edge of the inside pocket for decoration.


7. Lay Piece 1 Rectangle with Fusible Interfacing face down.
8. Take inside pocket (piece) 2 top of Above Piece with the cut folded edge up lining up the bottoms of the two pieces.
9. Cut 14 inches of ribbon (tie)
l0. Fold in half and pin on the right side at where the pocket and back meet.
(make sure the ties ends face left and the fold in right at the edge).
11. Take the other outer rectangle and place wrong side up on top of the main sandwiched pieces and pin.
12. Begin sewing in the middle of the top section all the way around leaving 3 inches open using 1/2 inch seam allowances.
13. Clip off the square corners and then flip inside out.
14. Press the crayon holder flat
15. Handstitch the opening closed.


16. Beginning on the left, using a ruler place pins at the top and bottom of the inside pocket every 1 1/2 inches to form crayon holder stitching.
17. Turn the holder with the pocket edge to the back of the machine and stitch the crayon holder lines from pin to pin.


18. Clip your threads.
19. Place the crayons in the holder
20. YOU ARE DONE!

Tuesday, March 17, 2009

75 Degrees in March in Wisconsin?


What do you do when it is 75 degrees in March and windy?


Go Fly A Kite


Becca had the best idea for this sunny windy warm March Day here in Wisconsin?


We spent the afternoon after I finished hanging my laundry out to dry, flying one of our $1.00 kites for the Dollar Tree Store. She could not decide which one she wanted and pointed out that they tend to get lost into the trees or whatever.

The Simplicity of being outside in the sun and the blue skies with my daughter.

Saturday, February 28, 2009

Homemade Silly Putty

I am always thrilled to find childrens sensory activities on the internet. Today at one of my favorite websites I discovered a post for making homemade silly putty. I printed it right out and this week Miss Becca and I will be making it, practicing following a recipe and it will double as a homeschool science lesson. I will have to buy some starch, but we have plenty of glue left over from the backpack project, I can spare a couple of bottles out of our couple of hundred.

Homemade Silly Putty at Penny Pinching Parent

I remember my own silly putty adventures with copying the comics to the putty. I will store it in one of my many plastic easter eggs and Becca and I will make a few extra for our Easter Egg Hunt extravaganza that we are organizing for friends and my husbands collegues children.

Monday, February 16, 2009

Indoor Sensory Craft--Homemade Moon Sand


This morning while I was out cruising my favorite blogs and discovered a creative post worth sharing.

Make your own Moon Sand at PennyPinchingParent.com. With my daughters and my friends who have autistic and children with special needs, we are always looking for creative sensory activities. This is perfect for our kids. Thank you for the great idea.

Anny